Contents:
How to upload template to the platform
Note: When the template is applied to the device, its previous data streams are removed and replaced with new data streams. The device's original technical streams, reports, logs, and commands remain.
The client’s role must be an Account Owner to perform import of the zip file.
How to upload template to the platform:
- Send the Ayyeka team the following information:
- Sensor Names & Datasheets (If sensors are not from Ayyeka)
- Anything special about the configuration.
- Wavelet Model and Firmware Version
Note: Dependent on the template specification Ayyeka might need to update an existing or create a custom template. This is an out of scope task and would require additional payment.
- The Ayyeka Support team will send back to the client a zip file containing the new firmware.
- The client will need to upload the new template to the on-premise platform:
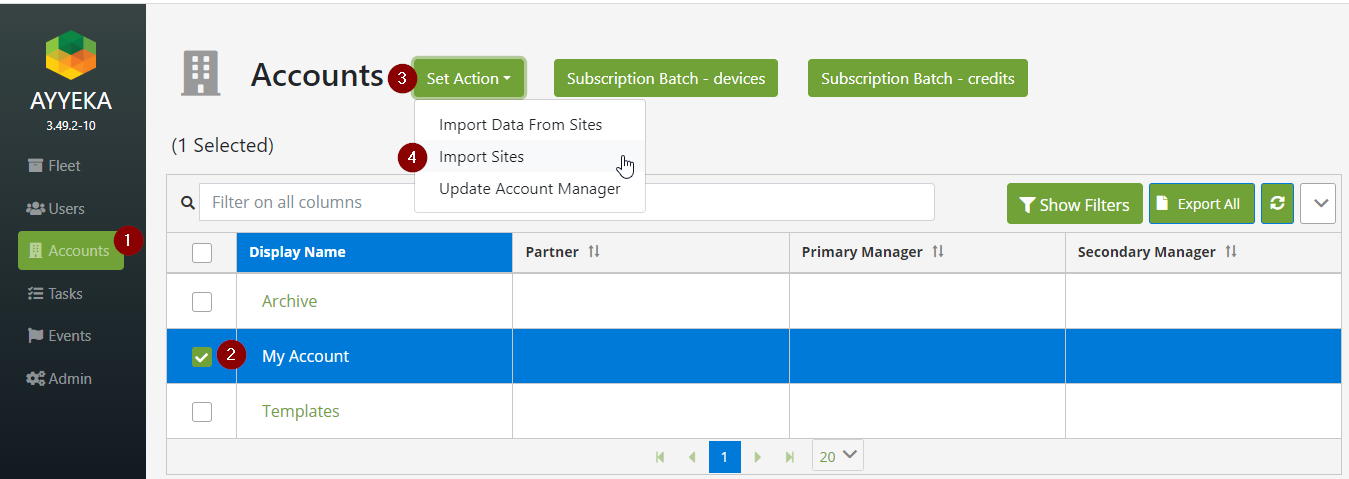
- Go to Fleet, choose Account.
- Choose your account.
- Go to “Set Actions” and “Import sites”.
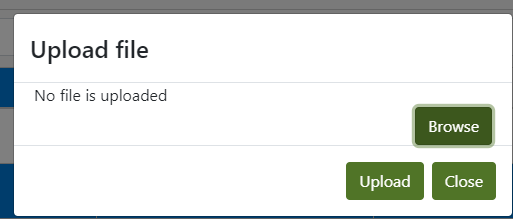
d. Browse for the zip that was provided to you by the Ayyeka Support team and Upload the file.
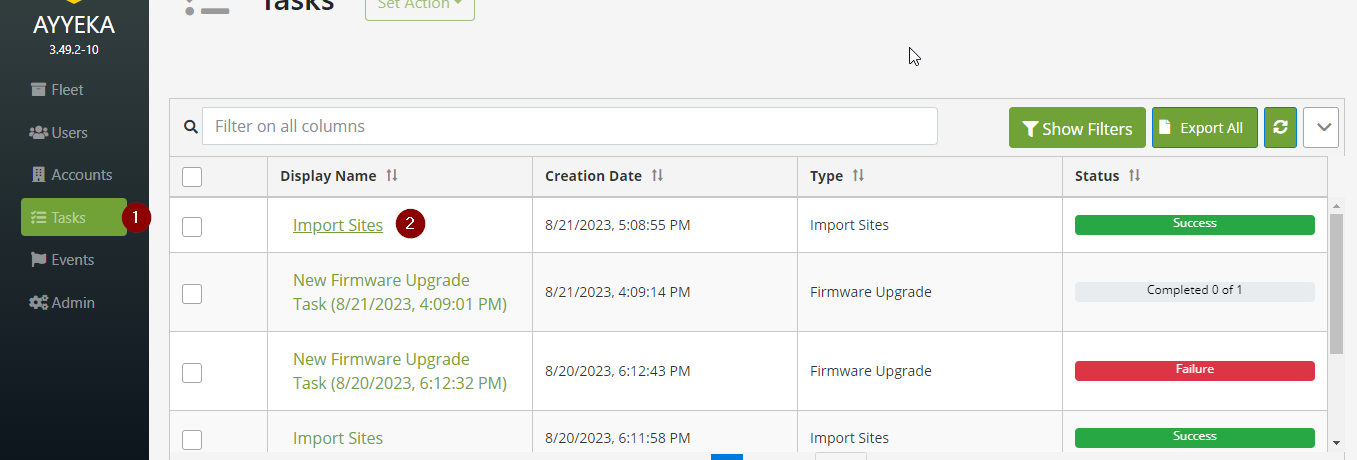
e. Check in Fleet → Tasks, that the zip file was uploaded successfully.
To apply the template:
- Click Fleet in the left pane. The Devices window opens.
- In the Devices window, choose the target device that you want to apply the template to. If you select multiple devices, check the Firmware column to ensure that their firmware versions are compatible.
- Click Set Action > Apply Template.
- In the Template window, select the template that you want to apply.
You will only see templates that are assigned to you. If the new template is not listed, then the template is not compatible with the target devices in the Site. This case is typically caused by mismatched firmware versions or hardware.
5. Click Next. The template will be checked to be sure that it is compatible with the devices that you selected. Any incompatible settings will be listed as WARNINGS. You can either ignore the warnings or resolve them. If you choose OK to ignore the warnings, those settings are ignored and the remaining settings in the template are applied.
6. Select the Accept check box, and then click Submit. The template is applied to the device. This process might take up to one hour, depending on how often the device transmits.
7. If the template application succeeds, skip this step. Otherwise, do the following steps:
- If the Apply Template fails, a message with the cause of failure will be displayed. Click the reason to get details.
- If you are applying the template to multiple target devices, some devices might fail while others succeed. In this case, the status will say “Failed”, even though the template was successfully applied to some target devices. The error message will indicate which device failed and why.
To verify the template:
After you apply the new template to the device, verify that everything works in the lab before taking it to the field.
- Connect the sensor to the device.
- Return to the Ayyeka UI window. Check that the new data streams are sending data and that the values are what you expect.