By connecting to your device with PuTTY, you can see logs that are not displayed in the the UI, connection attempts, reasons why transmission is failing, and so on.
Additionally, all the commands sent through the UI that never got to the device now can be sent directly to the device, thereby forcing it to receive commands even without transmitting. From the PuTTY window, you can get a device trace and run AK commands.
Note that earlier versions of Wavelet 4R do not have a USB port.
Table of Contents
CREG (Cellular Registration on a Network) Codes
To send commands via Trace to the Wavelet
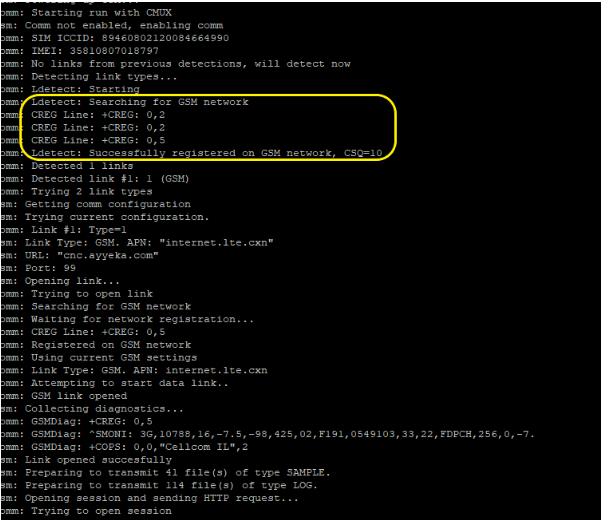
Example #1 GSM modem successfully connects to the server
Another example of successful communication
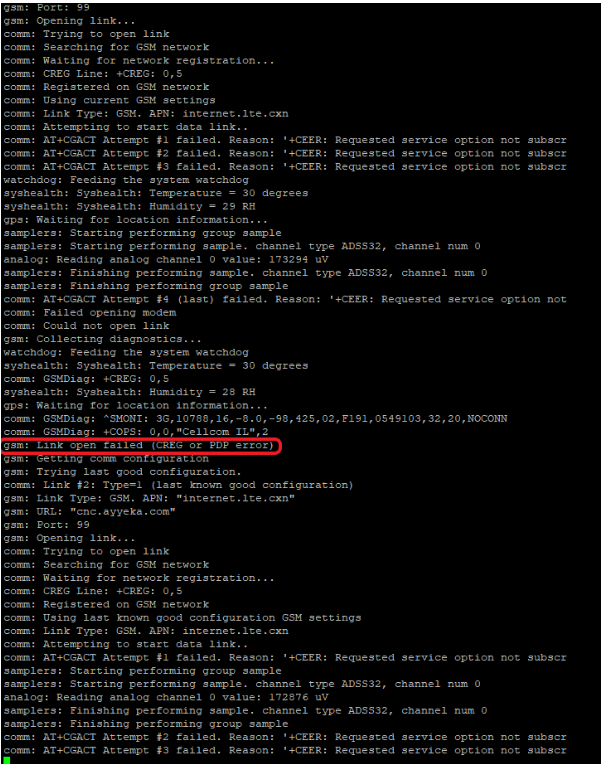
Example #2 Found APN (Access Point Name), but unable to register
Example #3 Searched for a network, and then connected with a roaming network
Prerequisites
-
Make sure you have a Micro-USB cable and a laptop.
- Ensure that the Micro-USB cable is functioning correctly by testing connectivity between another device (not a Wavelet) and your laptop.
- If PuTTY is not installed on the laptop, download PuTTY terminal emulation software to the laptop.
Connecting to the Device
- On the back of the device, unscrew the six (6) screws until you can lift off the back panel with the screws still affixed to their screw holes.
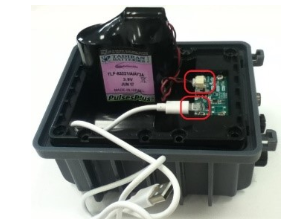
Note: To prevent damage to the screws, it is recommended to begin by loosening them manually before using an electric screwdriver. - Stand the battery on its side to expose the USB port. Do not disconnect the battery from the interface board.
- Use the Micro-USB cable to connect the device’s interface board and your laptop.
Hazard: At the USB port side in the Wavelet, be careful that the cable does not pull up. Upward tension on the USB port might disconnect the port from the device's interface board.
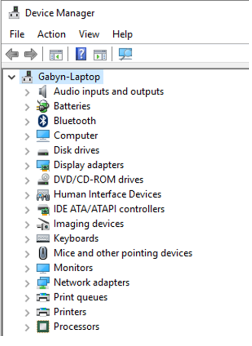
4. On your laptop, open the Device Manager and check if Ports (COM & LPT) exists. This section might be missing if no ports are connected, as shown below.
If the Ports (COM & LPT) device is not listed, do the following steps:
-
-
- Click Action > Add legacy hardware, and then click Next.
-
Select Install the hardware that I manually select from a list (Advanced), and then click Next.
-
Scroll down, select Ports (COM & LPT), then click Next.
-
Select Manufacturer, and then select standard or default option. Click Next.
-
5. When Ports (COM & LPT) is listed, download and install the D2XX drivers from FTDI Chip that are appropriate for your operating system. For any driver problems, see FTDI Chip Installation Guides.
6. After the drivers are installed on your laptop, unplug and then replug the USB cable into the USB port.
7. Refresh the Device Manager. The COM port appearing in the USB Serial Port line is the device’s COM port. In this example, the Wavelet is connected to COM4 USB Serial port.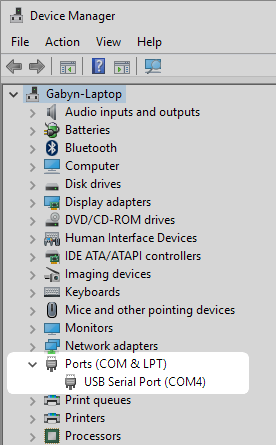
8. Double-click putty.exe to open a PuTTY terminal.
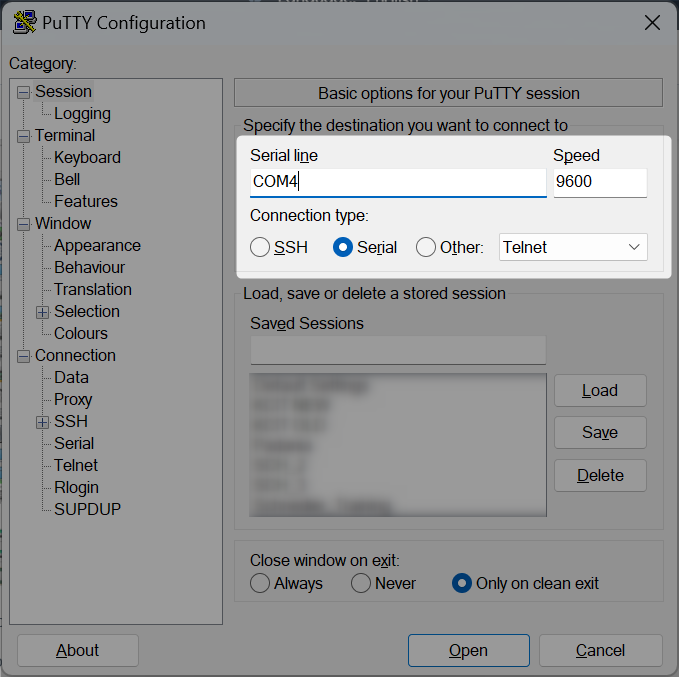
9. Configure the following parameters:
-
- Connection type – Serial
- Serial line – The COM port that was added after micro-USB connection
- Speed – 9600 Baud per second
Display Device Trace
In the PuTTY Configuration window, click Open to display the device trace in a new window. The device trace output is continuously sent to the terminal as log information becomes available.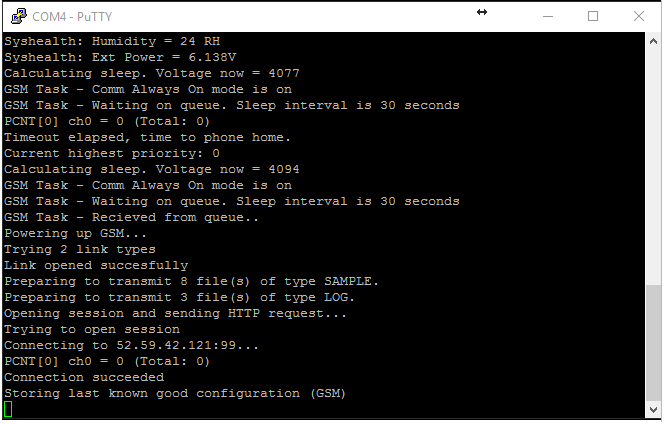
Typically, you need to check the output for at least 15 minutes. Some messages are displayed only after several retry attempts are made.
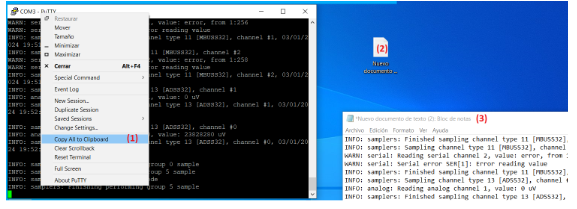
To save the Putty logs:
To send commands via Trace to the Wavelet:
HTTPS Error Codes
|
Code |
Description |
|
1xx: Informational |
The request has been received and the process is continuing. |
|
2xx: Success |
The action was successfully received, understood, and accepted. |
|
3xx: Redirection |
Further action must be taken in order to complete the request. |
|
4xx: Client Error |
The request contains incorrect syntax or cannot be fulfilled. |
|
5xx: Server Error |
The server failed to fulfill an apparently valid request. 500: Request denied by server 503: No response from server |
Examples
Example #1 GSM modem successfully connects to the server
- In the window, type GSM pipe, and then click Enter.
- Look for the string “(Success)”.
The following output shows what you might see: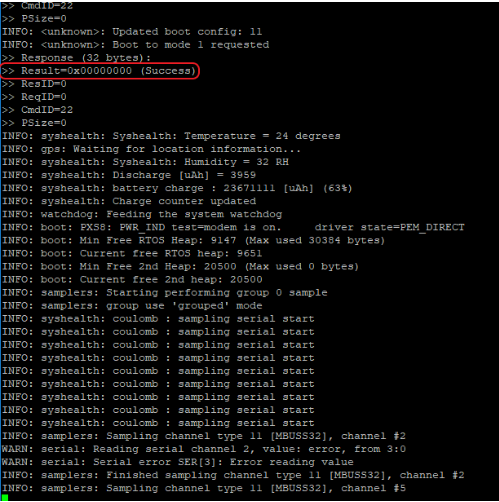
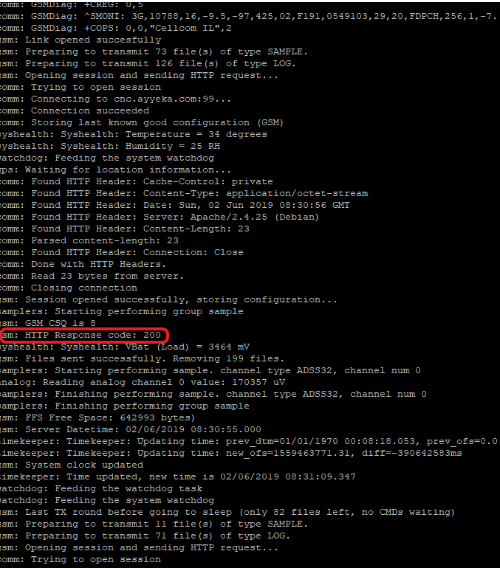
Another example of successful communication
Example #2 Found APN (Access Point Name), but unable to register
Example #3 Searched for a network, and then connected with a roaming network
For details, see HTTP – Status Codes.
CREG (Cellular Registration on a Network) Codes
|
Code |
Description |
|
0,0 |
No SIM card available |
|
0,1 |
Connected to provider’s SIM card |
|
0,2 |
Searching for network |
|
0,3 |
Denied by SIM provider (or might be that the SIM card is not activated) |
|
0,5 |
Connected to roaming network |