Replacing the battery of a Wavelet Ex™ must be done outside of the explosive, hazardous area!
In a Wavelet Ex™, you must use only a battery that is specifically for Wavelet Ex™!

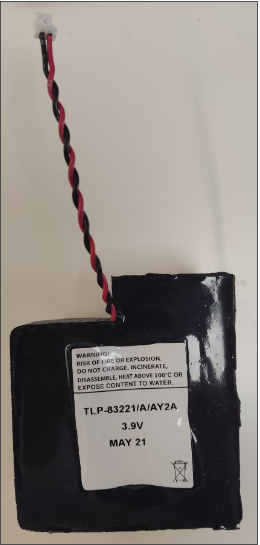
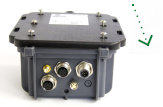
Figure 1. Back View of Battery Figure 2. Front View of Battery in all other devices
in a Wavelet Ex
Battery Life and Battery Status Streams
- If your device has Firmware version 2.234 or later, the device will have a Battery Life stream. Battery Life is a percentage of the battery that is still available for use based on an empirical measurement of battery charge consumption and based on the tracking battery usage.
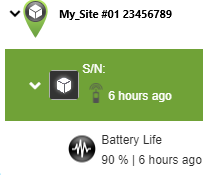
- If your device has Firmware version older than 2.234 or if the device is a Wavelet 3™, the device will have a Battery Status stream. This stream is an estimate, in percentage, of the battery charge.
Prerequisite
- You must have a torque screwdriver.
- The replacement battery must be new and not reused. Otherwise, when you reset the battery status in the the UI or in the AyyekaGo mobile app, the Battery Status stream data might not be accurate.
- To reset the battery status in Fleet, you must have Partner role.
Watch a two-minute video about how to replace the battery.
To replace the battery:
|
|
1. Beware of static discharge, making sure to work in a clean environment and ensuring that your hands and the device are completely dry. |
|
|
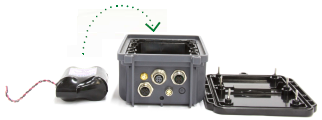
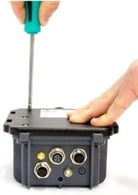
2. Partially unscrew the six (6) screws located on the back of the device enclosure, until you can lift off the back panel with the screws still affixed to their screw holes.
Note: To prevent damage to the screws, it is recommended to begin by loosening them manually before using an electric screwdriver. |
|
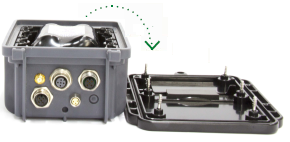
3. Remove the device’s back panel and place it flat-side down adjacent to the device box.
Warning: Do not remove the rubber gasket that sits inside the rim of the back panel. The gasket is thin and not glued to the back panel.
|
|
|
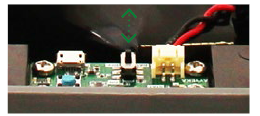
4. On the interface board, move the ON/OFF switch to the OFF position. |
|
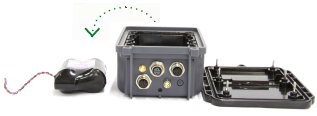
5. Carefully disconnect the male end of the battery connector cable from the female connector on the interface board. Using an indelible pen, mark the battery as “Used” and dispose of it properly. |
|
6. Mark the new battery with the current date. Place the battery in the device enclosure and carefully connect the male end of the battery connector cable to the female connector on the interface board. In all other devices, verify that the green, red, and blue LED lights on the interface board blink briefly. This confirms that the battery has been successfully connected. |
|
|
7. On the interface board, move the ON/OFF switch to the ON position. The device turns on and performs a 10-minute calibration process, after which it starts operating in normal mode. |
|
|
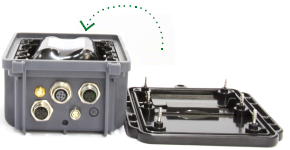
8. Replace the device back panel, ensuring that the battery cable is neatly arranged and not pinched within the device enclosure.
Important: Ensure that the rubber gasket is in place in the back panel. The gasket prevents water from entering the device.
If the gasket is missing, Ayyeka considers any subsequent water and/or dust damage to be the result of faulty use and/or maintenance. Those repairs will not be covered by the user's service contract. |
|
|
9. Tighten the six back panel screws with a torque of 1 Nm. Do not over-tighten because it will strip the screw threads.
Note: To avoid damaging the screws, it is recommended not to apply excessive force. |


10. Reset the battery status by doing either step:
- In the UI, do either action:
- Click Devices in the left pane, and then select the device in the Sites Tree pane. In the right pane, below the picture of the device, click Actions, and then select Reset Battery Life.
- Click Fleet in the left pane, and then select the device in the Devices pane. Click Set Action, and then select Reset Battery Life.
The device is now ready to resume monitoring and transmission.
- In the AyyekaGo mobile app, connect to the device, click More, and then click Reset Battery Life.