If you choose to set up an on-premises server instead of using the Ayyeka cloud platform, ensure it meets the system requirements and hardware specifications outlined in this document.
Using FAI Local you are also responsible for server operation including administration, backups, and maintenance.
This document provides a step-by-step guide for deployment. After installing Ubuntu on your server, you will install Ayyeka FAI Local and migrate each device from the cloud instance to your on-premises setup.
Important:
► After you installing FAI Local solution on your server, you will no longer recieve any user interface or Wavelet updates.
► Ayyeka does not take responsibility for server security, backing up or otherwise maintaining your on-premises server and data.
►It is the responsibility of the customer to provide redundancy, cyber security, and full disk encryption for any on-premises deployment.
Contents
Planning for an On-Premises Server
Inbound Traffic and Open Ports
Outbound Traffic to Map Provider
Supported Subnets Used by the Installation Procedure
Step 1: Connect to Ubuntu Server
Step 3: Verify the Installation
Step 4: Change the Admin User Password
Step 5: Designate the SMTP Server Connection String
Planning for an On-Premises Server
The server admin need the following skill set:
-
Linux server maintenance (familiarity with Ubuntu distribution version 24.04)
-
Administrative responsibility for server, network, security, backups, etc.
- Knowledge on how to supply the security appliances to secure device communication. See the section Network and Security.
An enterprise email server, or a dedicated email server must be available that will perform the following tasks:
-
Email notification
-
User invitations
The user workstation that will act as a client to connect to the on-premises server during the installation, needs the following software tools:
-
SSH client connects to the on-premises server
-
FTP/SCP tool for uploading resource files to the on-premises server
You must provide your own SIM card for each device that will communicate with the on-premises server, or purchase SIM cards and SIM service from Ayyeka. Information about the SIM card that you provide is not available in the Cellular Sessions tab for the device.
Network and Security
Inbound Traffic and Open Ports
The following table lists the open ports on the on-premise server that must be secured with your firewall and network security tools.
| TCP Port | Description | Direction | Recommend Firewall Configuration |
| 8883 | MQTT device communication | Inbound | Must be opened in your external network firewall to allow inbound device traffic & do port forwarding to your FAI Local Server |
| 9443 | HTTPS device communication | Inbound | Must be opened in your external network firewall to allow inbound device traffic & do port forwarding to your FAI Local Server |
| 99 | Firmware-over-the-air | Inbound | Must be opened in your external network firewall to allow inbound device traffic & do port forwarding to your FAI Local Server |
| 443 | Web user interface | Inbound | Allowed for internal users only, closed for external traffic, could be opened for external traffic if FAI is required to be used outside of company's network. |
Outbound Traffic to Map Provider
The web user interface uses a 3rd party mapping provider. In order to allow the web browser to load maps, allow the following outbound traffic through your firewall:
| Target IP/Host | Port |
| mapbox.com | 443 |
| api.mapbox.com | 443 |
| api.tiles.mapbox.com | 443 |
If you would like to remove 3rd party maps you can remove it as a super admin user.
Subnets Used by the Installation Procedure
The installation procedure uses the following subnets:
- 172.25.0.0/24
- 172.25.1.0/24
- 172.25.2.0/24
- 172.25.3.0/24
TLS Certificate
As part of security enhancements since version 5.8.1 of On-Prem, HTTP communication between the On-Prem API and Agents now occurs over TLS as this requires a Domain Validated (DV) server certificate with domain/IP validation. Please refer to the following document.
Prerequisites
- Fixed IP address or DNS for inbound HTTPS/MQTT traffic from the devices. See the required list of inbound device ports above.
- You must know the internal IP address or DNS host name of your on-premises server.
- You must know the SMTP server host, the SMTP port, the SMTP username, and the SMTP password for the email server.
- Contact support@ayyeka.com to get the installation deliverables (onprem_offline_install_*.run).
The on-premises server must fulfill the following requirements:
- The server must be a dedicated server for on-premises use only.
- You must be an Administrative user with sudo privileges. If you need to add or edit a user, see Adding a New User and Editing a User.
Note: It is recommended that you change the sudo password timeout to at least 60 minutes.
- Server Requirements:
-
The Ayyeka on-premises deployment requires a clean installation of the standard Ubuntu Server 24.04 LTS, without any third-party modifications or custom distributions.
Please use the official vanilla version available directly from ubuntu.com.
This ensures full compatibility with Ayyeka’s automated deployment scripts and system dependencies. - The timezone must be set to UTC. This is the default timezone on ubuntu server. If not you can change it following this guide.
- Ensure this 3rd party libs are installed: moreutils, jq, unzip, mysql-client v8+, ansible, flyway, docker, docker-compose.
- The server's time must be synced via Network Time Protocol (NTP) - default for ubuntu servers - you can check with timedatectl.
-
There are two ways to install the libraries:
| Installation Method | Commands |
| Automatic by the Installer |
sudo OFFLINE_PACKAGES=Yes INSTALL_PATH=/opt/onprem ./onprem_offline_install_*.run Note:
|
| Manual on the command line |
sudo apt update |
- The on-premises server must have the following minimal hardware provisioned:
| Devices | Hardware Resources | Storage |
| For 1-50 Wavelets |
|
500 GB SSD |
| For 51-500 Wavelets |
|
1 TB SSD |
|
For 501-4000 Wavelets |
|
1 TB SSD |
1. Depending on your traffic and data volume, you might need to add more storage over time.
2. Running the Ayyeka software on an on-premises server is CPU-intensive. Therefore, this configuration is the minimum that you must have on your server.
Installation
In this section, you will connect to the Ubuntu server, and then install the Ayyeka on-premises software on the server. You will verify the installation and do a brief sanity check. Finally, you will configure an SMTP email server.
Step 1: Connect to Ubuntu Server
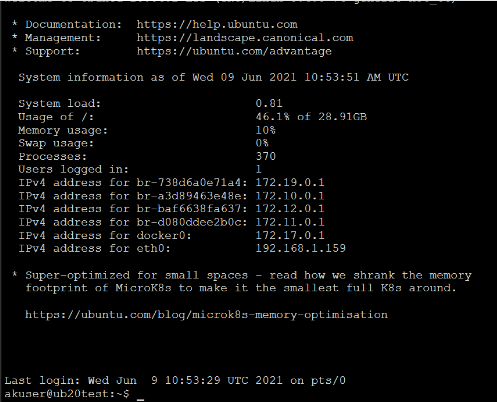
Use the SSH client to connect to the Ubuntu server. All of the following commands are executed from this SSH client.
- Log in with the operating system administrative user credentials.
- Copy onprem_offline_install_*.run to the installation directory.
Note: You might need to add the "execution attribute" to the command: chmod +x onprem_offline_install_*.run
Step 2: Perform the Installation
-
Run the following shell script to begin the installation:
sudo OFFLINE_PACKAGES=Yes INSTALL_PATH=/opt/onprem ./onprem_offline_install_<version>.run
Step 3: Verify the Installation
- Check the lines on the console following the “PLAY RECAP” line:

As part of the installation, the administrative user is added to the docker security group. This allows the administrative user to execute the post-installation scripts in subsequent steps.
2. Log out, and then log in to apply the new security privileges to the administrative user.
Step 4: Change the Admin User Password
It is highly recommended that you change the default password for the user interface "admin" user. However, even if you wish to retain the default password (temporarily), you need to run this command in order to set up internal configuration files.
- Run the change admin password shell script, from the Ubuntu console (SSH client), by typing the command:
dchpwd admin update_config
2. When prompted, enter the new password, and then press the Enter key. Repeat when requested to confirm the new password.
Note: A minimum of 12 characters is required for the new password.
The password must contain a combination of uppercase and lowercase letters and numbers.
Step 5: Designate the SMTP Server Connection String
Important:
If you are unable to provide these connection properties, you may skip this step for now, however without configuring the SMTP server, you will be unable to add users to the application and send email notifications when required.
- Run the command:
dsmtp_setup
2. Fill in the following information when prompted:
-
- SMTP Server Host
- SMTP Server Port
- SMTP Username
- SMTP Password
- Support TLS 1.2 - If the on-premises server uses TLS 1.2, then type in "Yes" (type out the entire word without the quotation marks, and capitalize the "Y")
- FromAddress (email address of sender)
3. Restart the SMTP service: drestart backend
4. Verify the successful SMTP configuration by performing Step 4 in the Sanity Check below.
Step 6: Do Sanity Check
- In your web browser, type in the new on-premises server's IP address (or domain name if it is registered in your DNS).
-
Log in to the UI with the administrator username (admin) and the password that you changed in Step 4, above.
- Create a new Account.
- From the new Account, click on the Invite User link to send yourself a User Invitation.
- Enter your email address, specify the Account Owner role, then click Submit.
- When you receive the Invitation email, open the email, and then click the Accept Invitation link.
- Complete your user profile: password, mobile number, time zone, and so forth.
- Log out of the UI as the administrator.
- Log into the UI as your new user with the Account Owner role.
- In the left pane of the UI, click API, and then click the Agents tab. Download the CSV Agent.
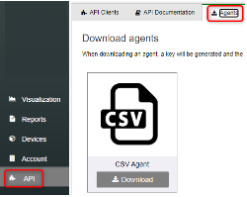
For an on-premises system, you must not generate the REST API keys when logged in as the (super)Admin user. The keys generated by the Admin user will not work.
If you need to redo the installation, do the following steps:
1. Go to the installation directory, and then run the uninstall.sh script located there ( ./uninstall.sh). Note: Any data in your database will be deleted.
2. Rerun Step 2 above.
Step 7: Final Steps
Encrypt the Server
As a security precaution, it is recommended that you encrypt the entire on-premises disk.
Migrate All Devices from the Cloud to the On-Premises Server
Now that you've installed Ayyeka On-Premises, devices will need to be migrated from the default on-cloud server to the on-premises server. Follow the steps in Device Migration from FAI Pro to FAI Local.
Set up a VPN (optional)
You are responsible for all maintenance, management, administration, and operations of your on-premises server. If you require assistance, contact support@ayyeka.com. You may wish to provide Ayyeka Support with direct access to your on-premises server.
For this reason, it is recommended that you set up a VPN so that if there are problems, Ayyeka Support can directly access your on-premises server. Otherwise, Support cannot access your system without your direct involvement.
To change the SSL/TLS certificate on the on-premises server (optional)
Note: nginx.crt and nginx.key should remain in the directory. They are used for ports 9443 and 8883, that receive device traffic. Do not change these configurations (ports 9443 and 8883). Changing these ports will block any device communication. The only port that should be modified is 443.